> For the complete documentation index, see [llms.txt](https://docs.developer.disruptive-technologies.com/llms.txt). Markdown versions of documentation pages are available by appending `.md` to page URLs; this page is available as [Markdown](https://docs.developer.disruptive-technologies.com/data-connectors/creating-a-google-pub-sub-data-connector.md).
# Creating a Google Pub/Sub Data Connector
A preview of the new Data Connector type that forwards data to a Google Pub/Sub topic.
A quick guide for setting up a Google Pub/Sub Data Connector using the Google Cloud Platform console and DT Studio.
### Prerequisites
* **DT Studio** **User Account**
Creating, updating, and deleting Data Connectors require that your user or service account has been granted the role **Project Developer** or higher
* **DT Studio Organization ID**
Note down the Organization ID of the Studio organization where you want to set up the Data Connector. This can be found by clicking your organization's name in the lower-left corner of DT Studio.
* **Google Cloud Platform Account**
A Google Cloud Platform account with sufficient permissions to set up a workload identity pool.
## Setting up Workload Identity Federation on Google Cloud
The Data Connector uses [Workload Identity Federation](https://cloud.google.com/iam/docs/workload-identity-federation) to authenticate to Pub/Sub. This section explains how to set it up.
The provider pool is used to hold workload identity providers. If you already have a pool, add the DT provider to your existing pool and skip the first step.
You will find **Workload Identity Federation** in the left pane of the **IAM & Admin** view. You’ll see a Get Started button if the API isn't enabled. Click that to enable the API.
If you don’t already have a Workload Identity Pool in your project, you’ll be taken directly to the form to create one. Otherwise, click **CREATE POOL** in the header bar to go to the creation form.
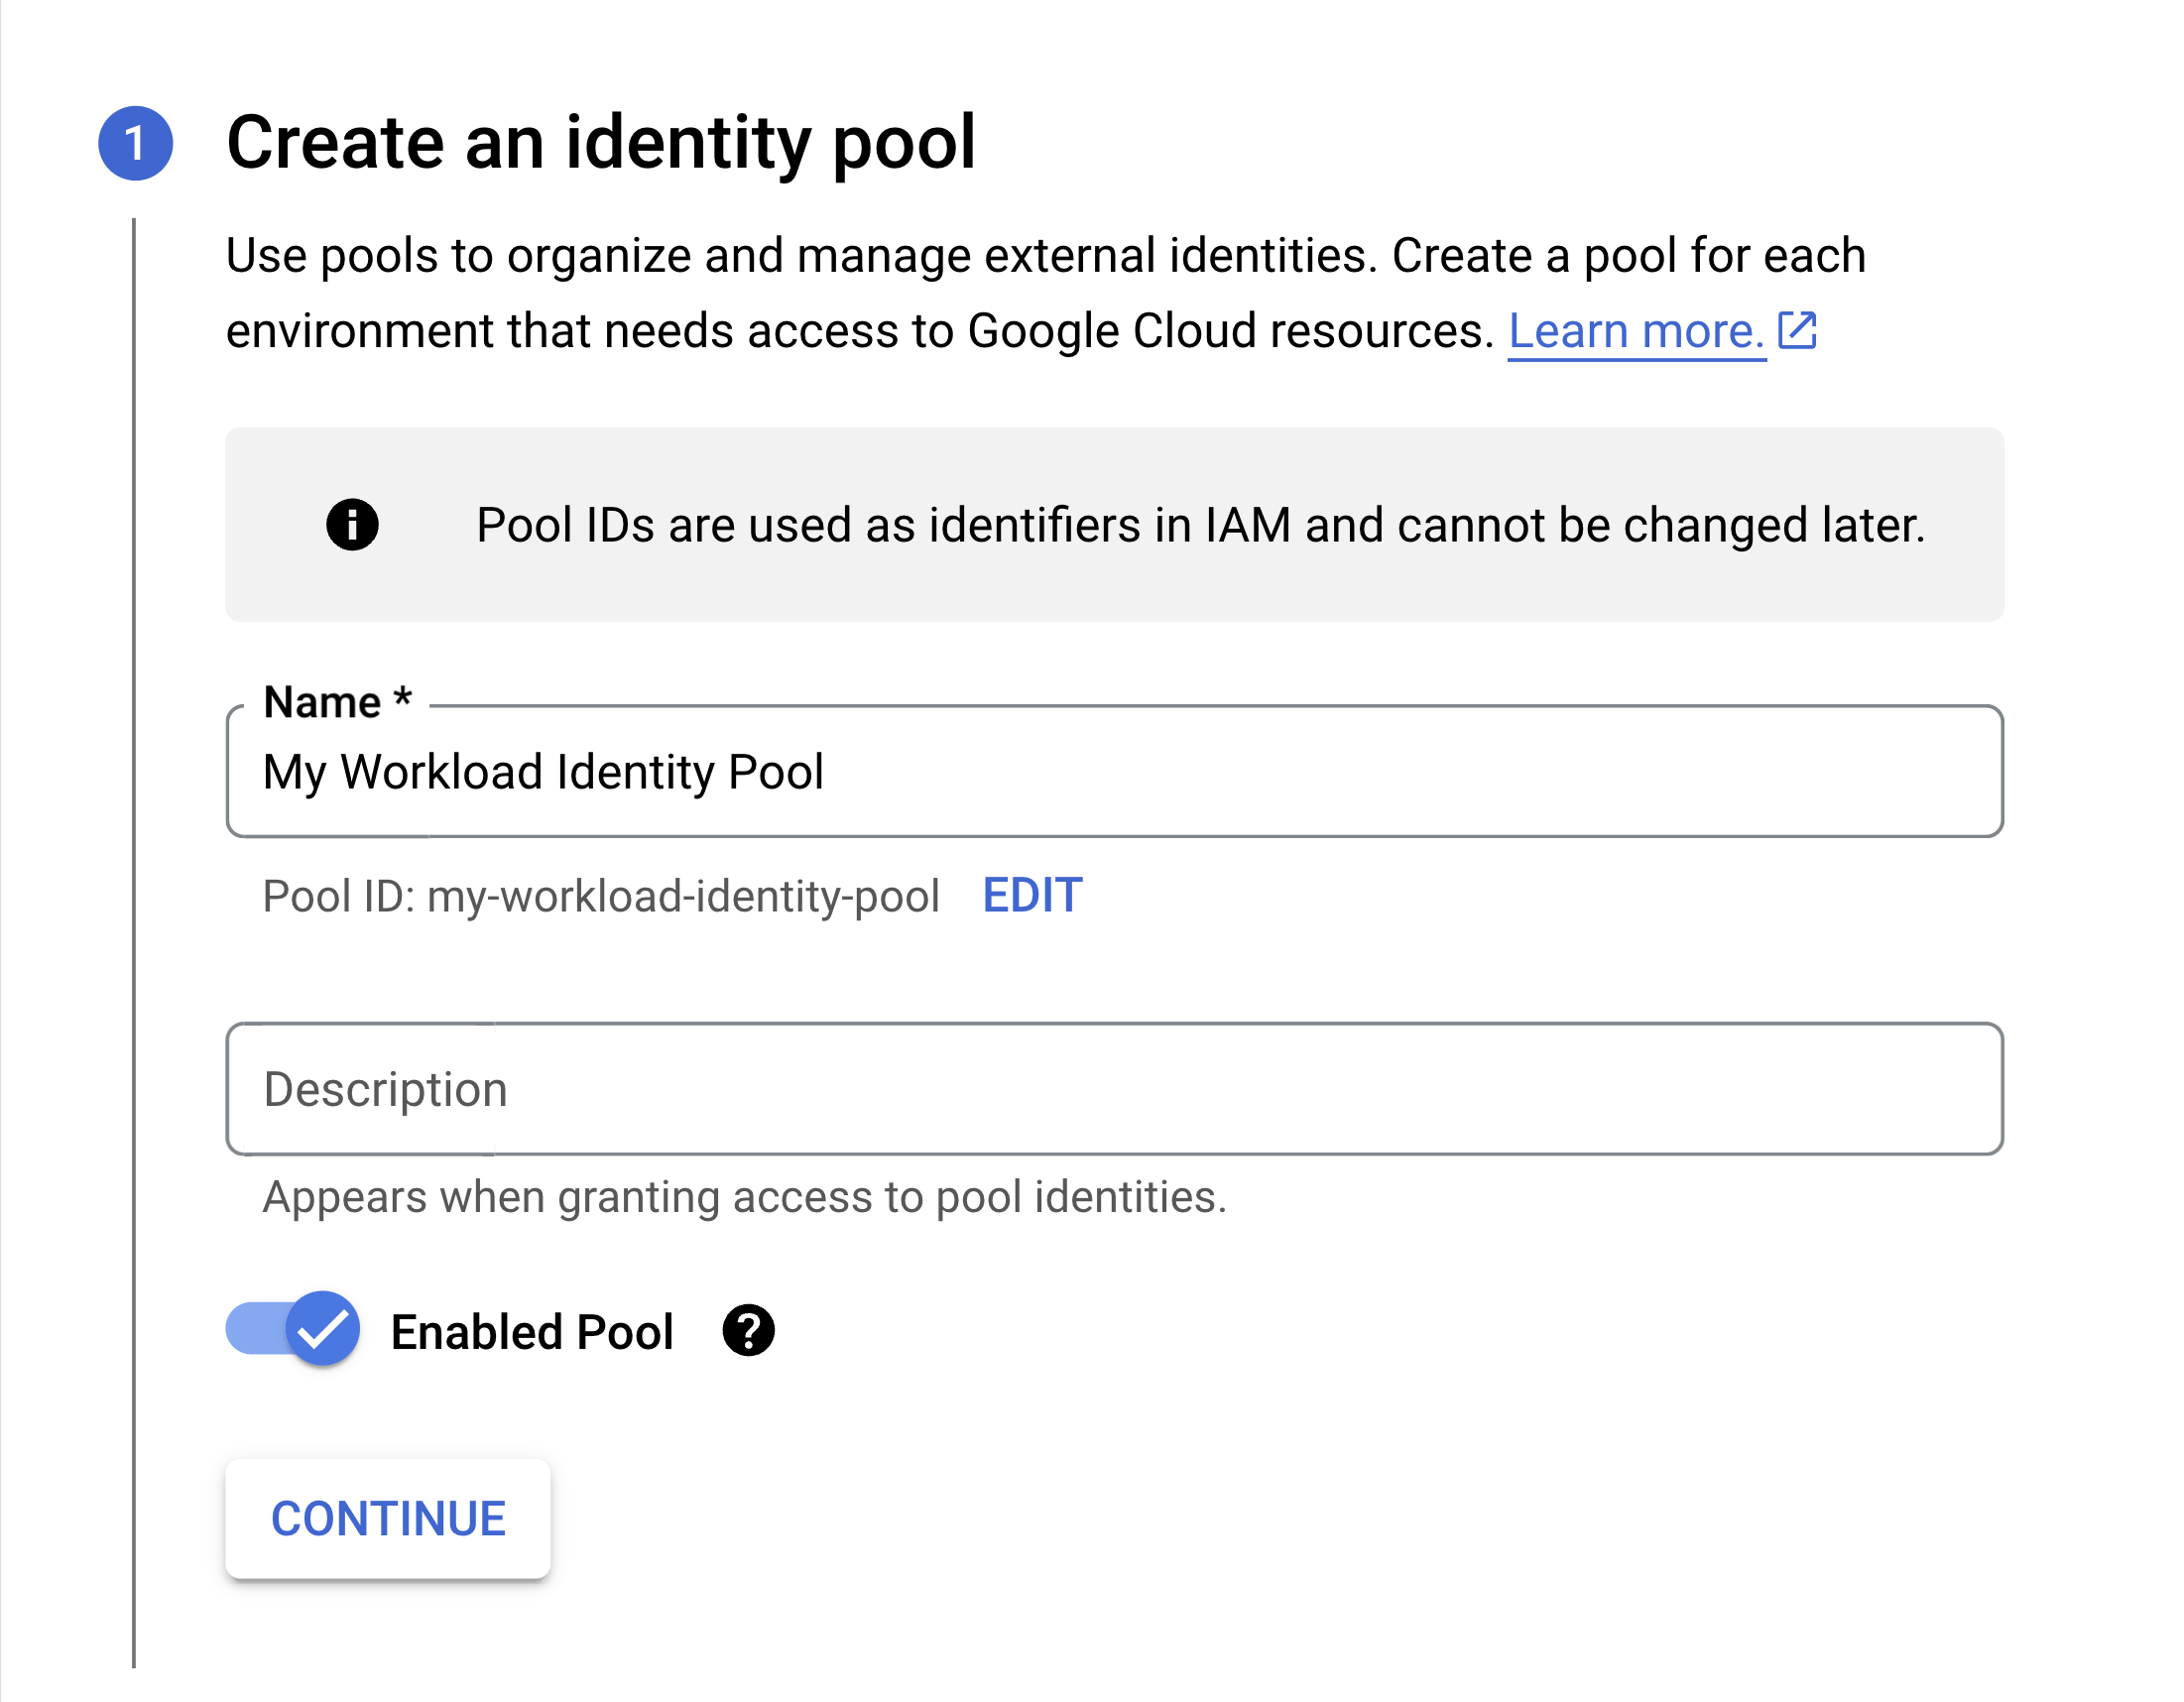
### 1. Create an identity pool
Give the pool a name and optionally a description, then click **CONTINUE.**
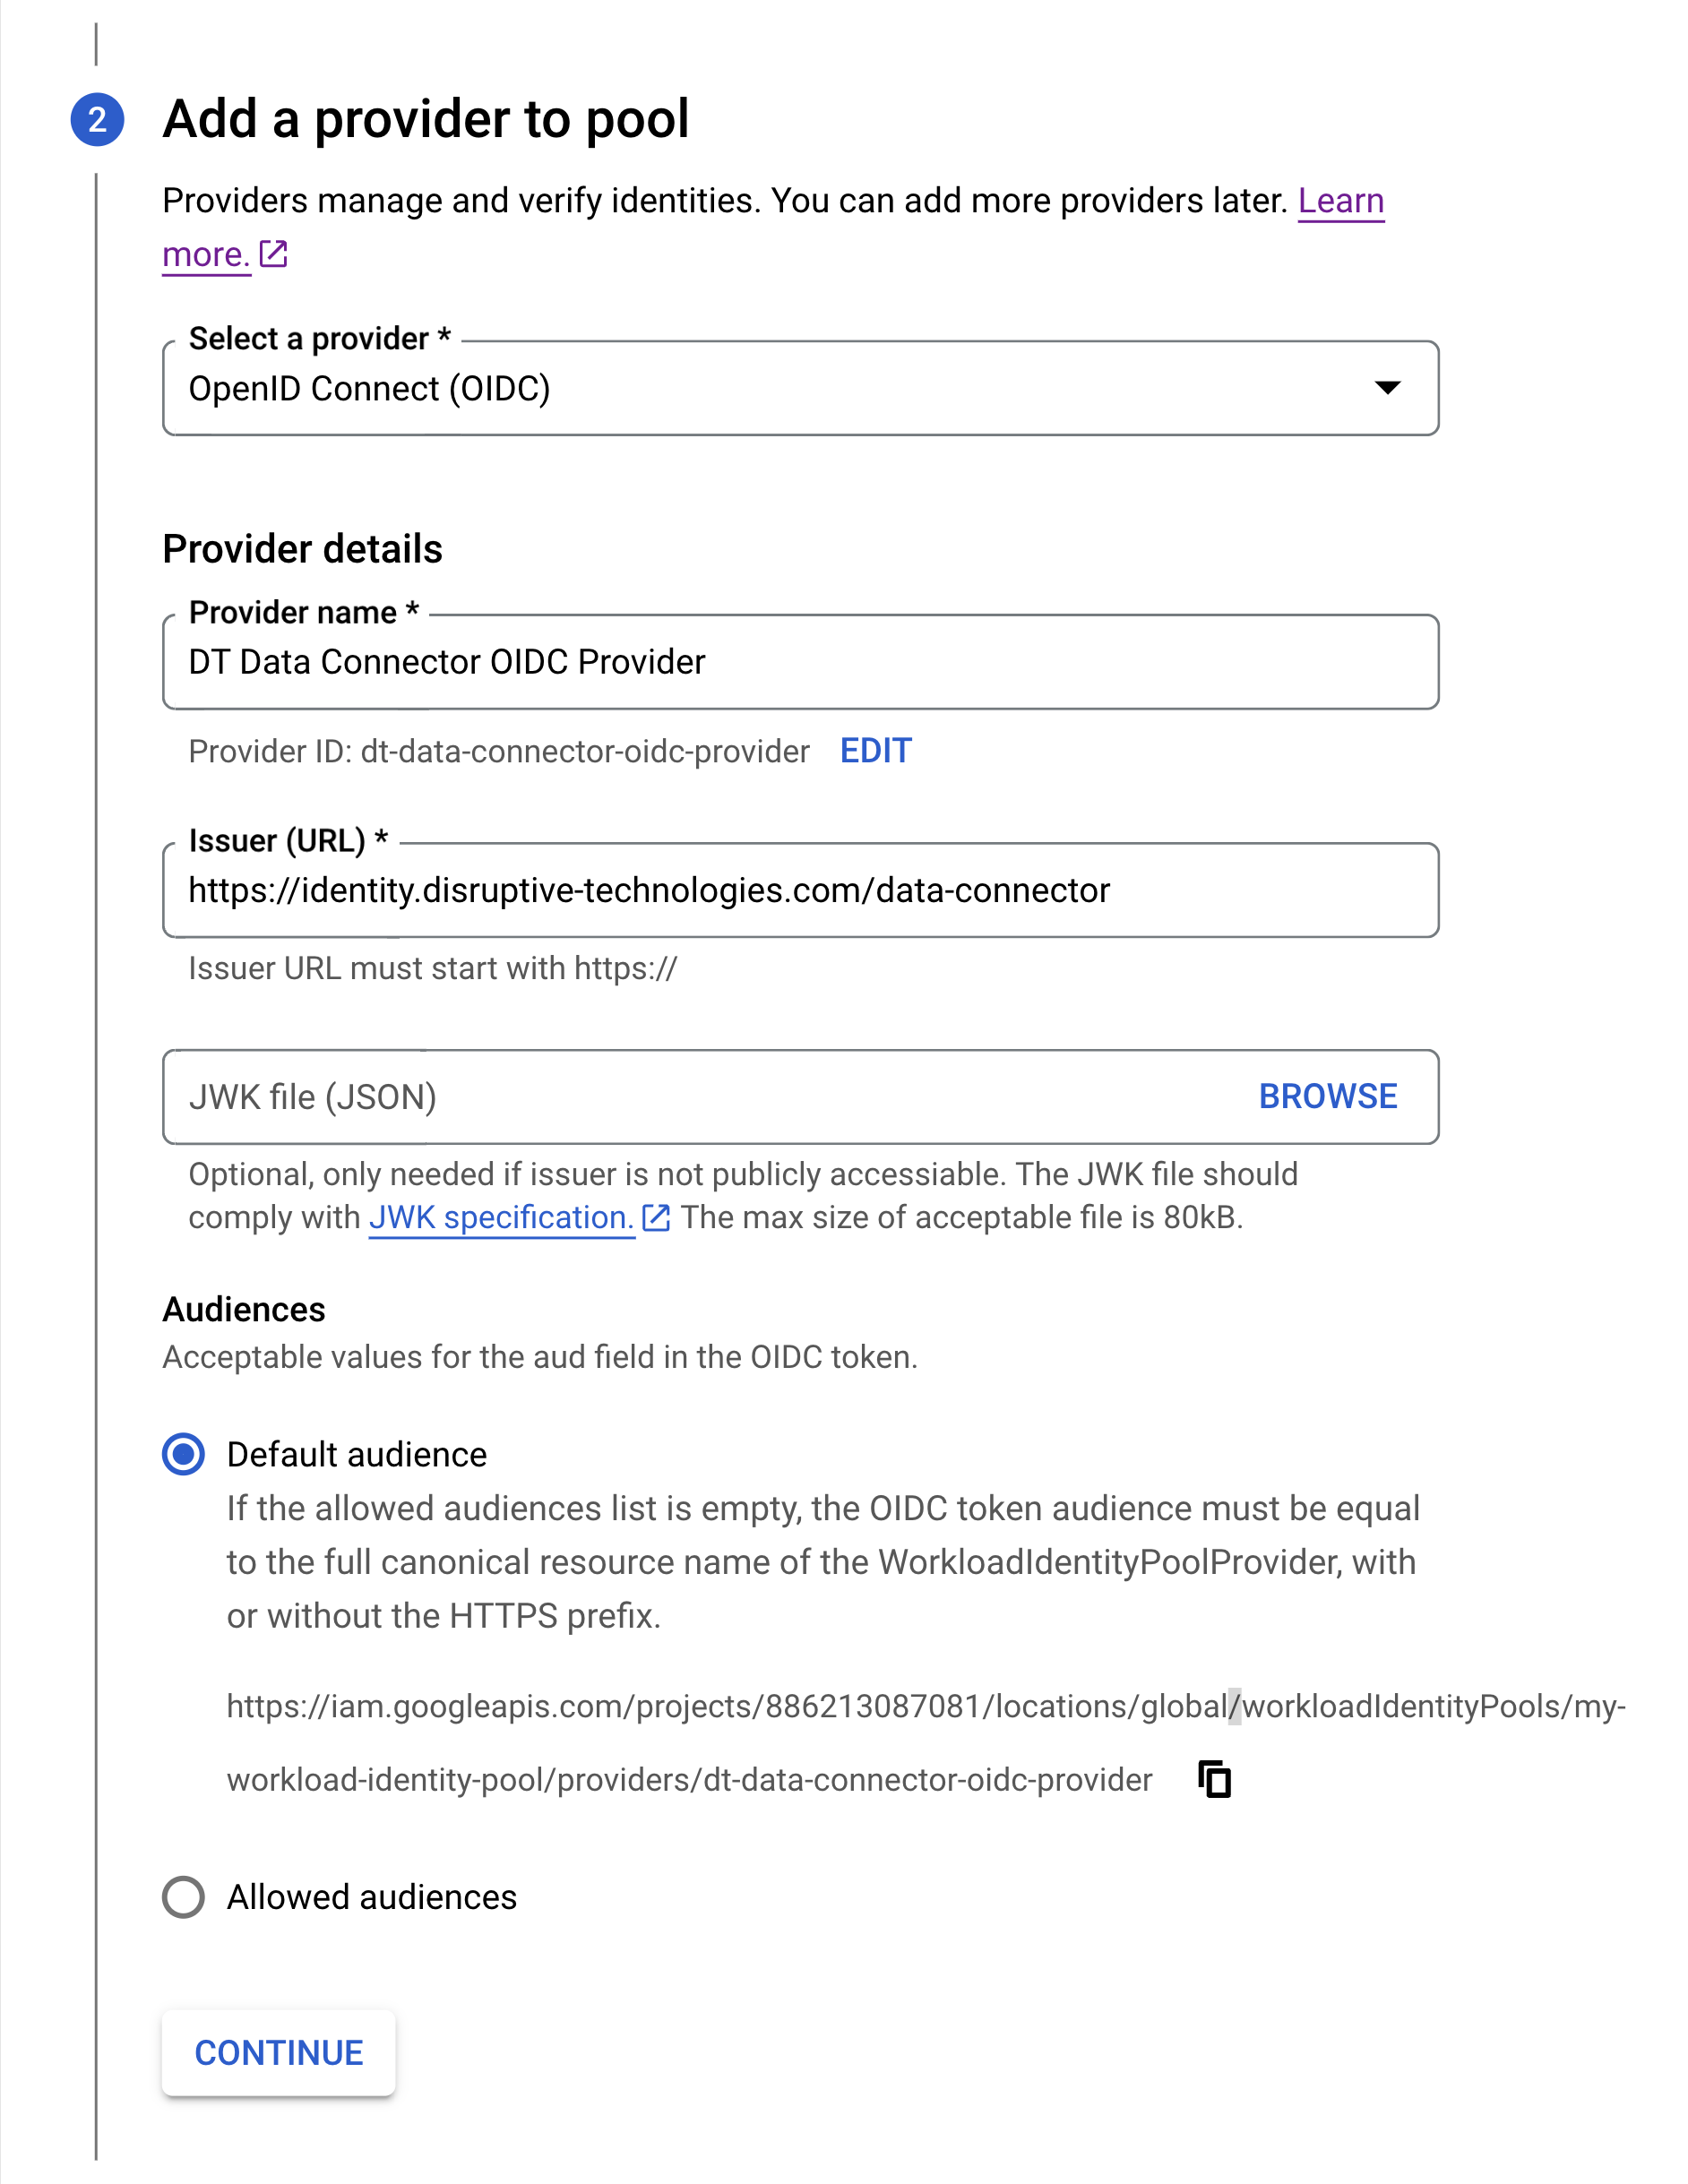
### 2. Add a provider to pool
Select **OpenID Connect(OIDC)** in the providers drop-down. Give the provider a name, optionally change the Provider ID, and enter the following value for the Issuer (URL):
```
https://identity.disruptive-technologies.com/data-connector
```
A JWK file is not needed, and the audience can be left as the **Default audience.** Make sure you copy the audience value as it will be needed in a later step.
Click **CONTINUE** to move on to configure the attributes.
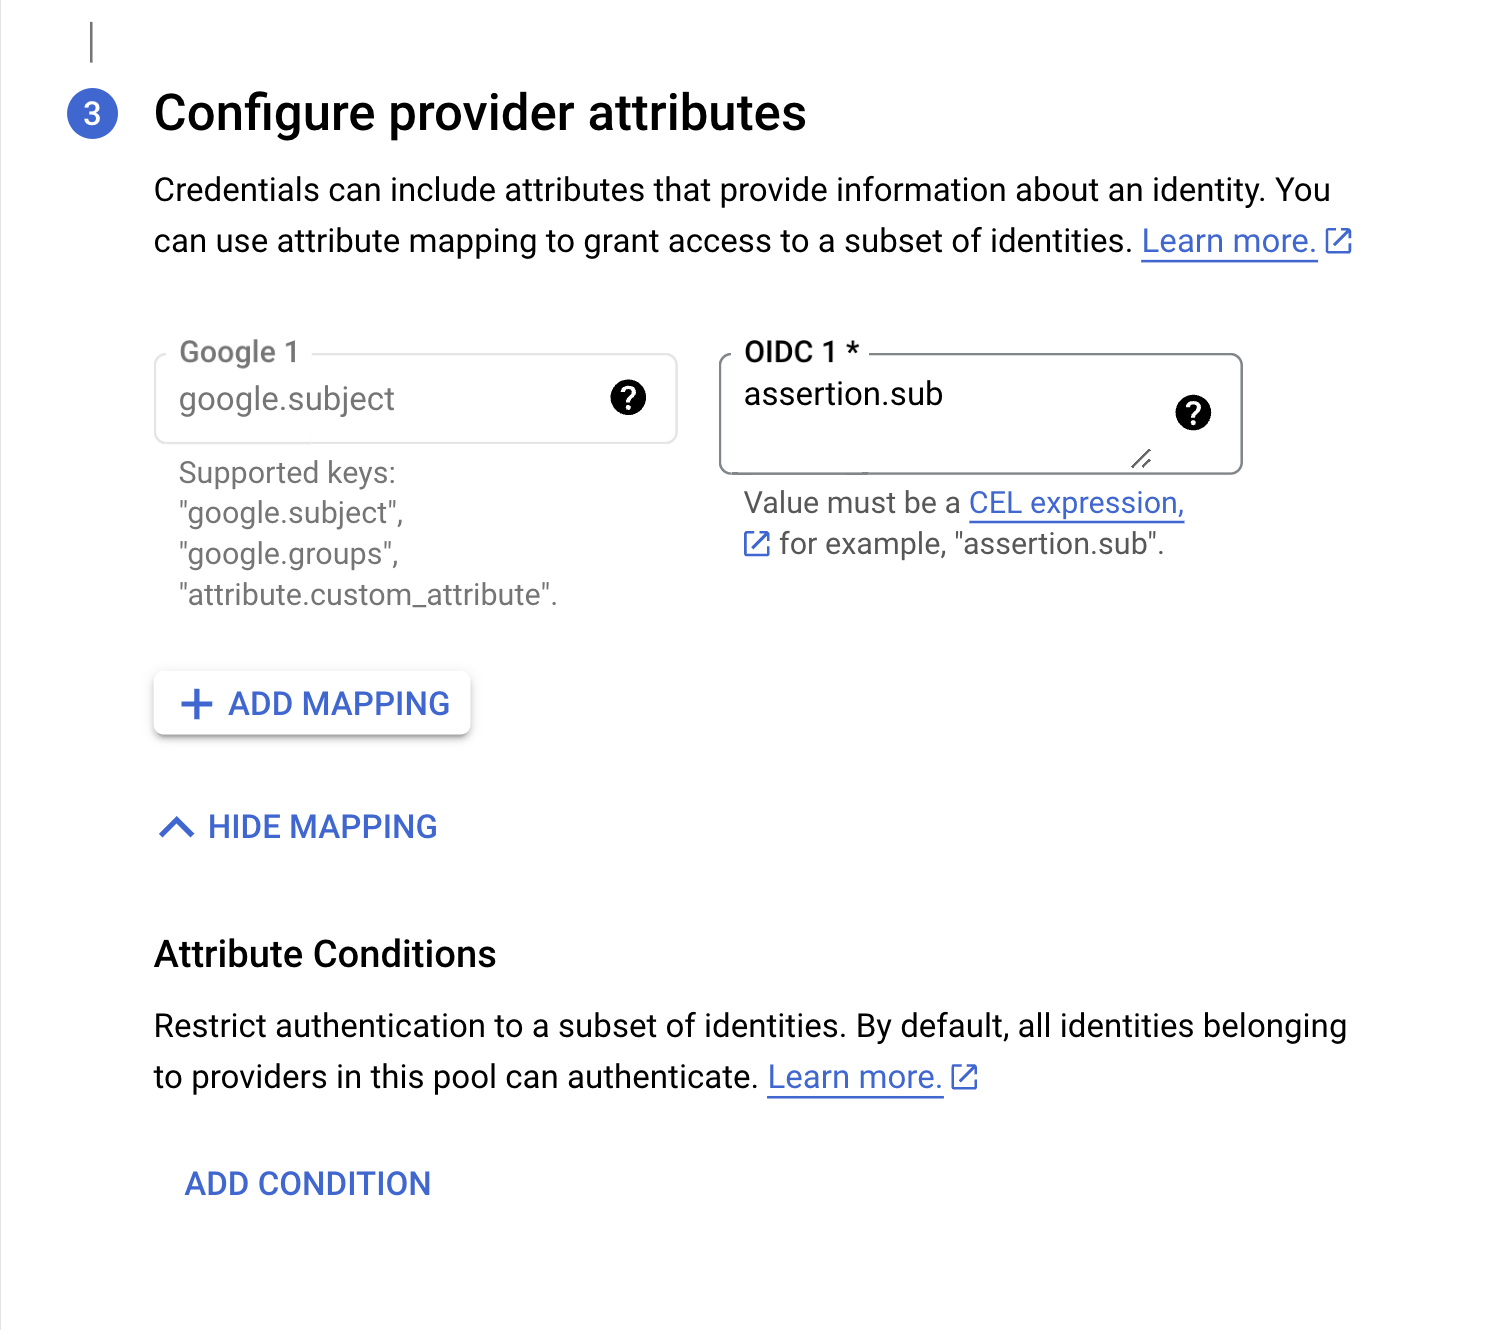
### 3. Configure provider attributes
Configure the **OIDC 1** to `assertion.sub`. Advanced users may add additional mappings here if needed.
Click **SAVE** to complete creating the Workload Identity Pool.
***
You should now see the Workload Identity Pool you just created. Make a copy of the **IAM principal** as it will be needed in a later step.
## Creating a Pub/Sub Topic
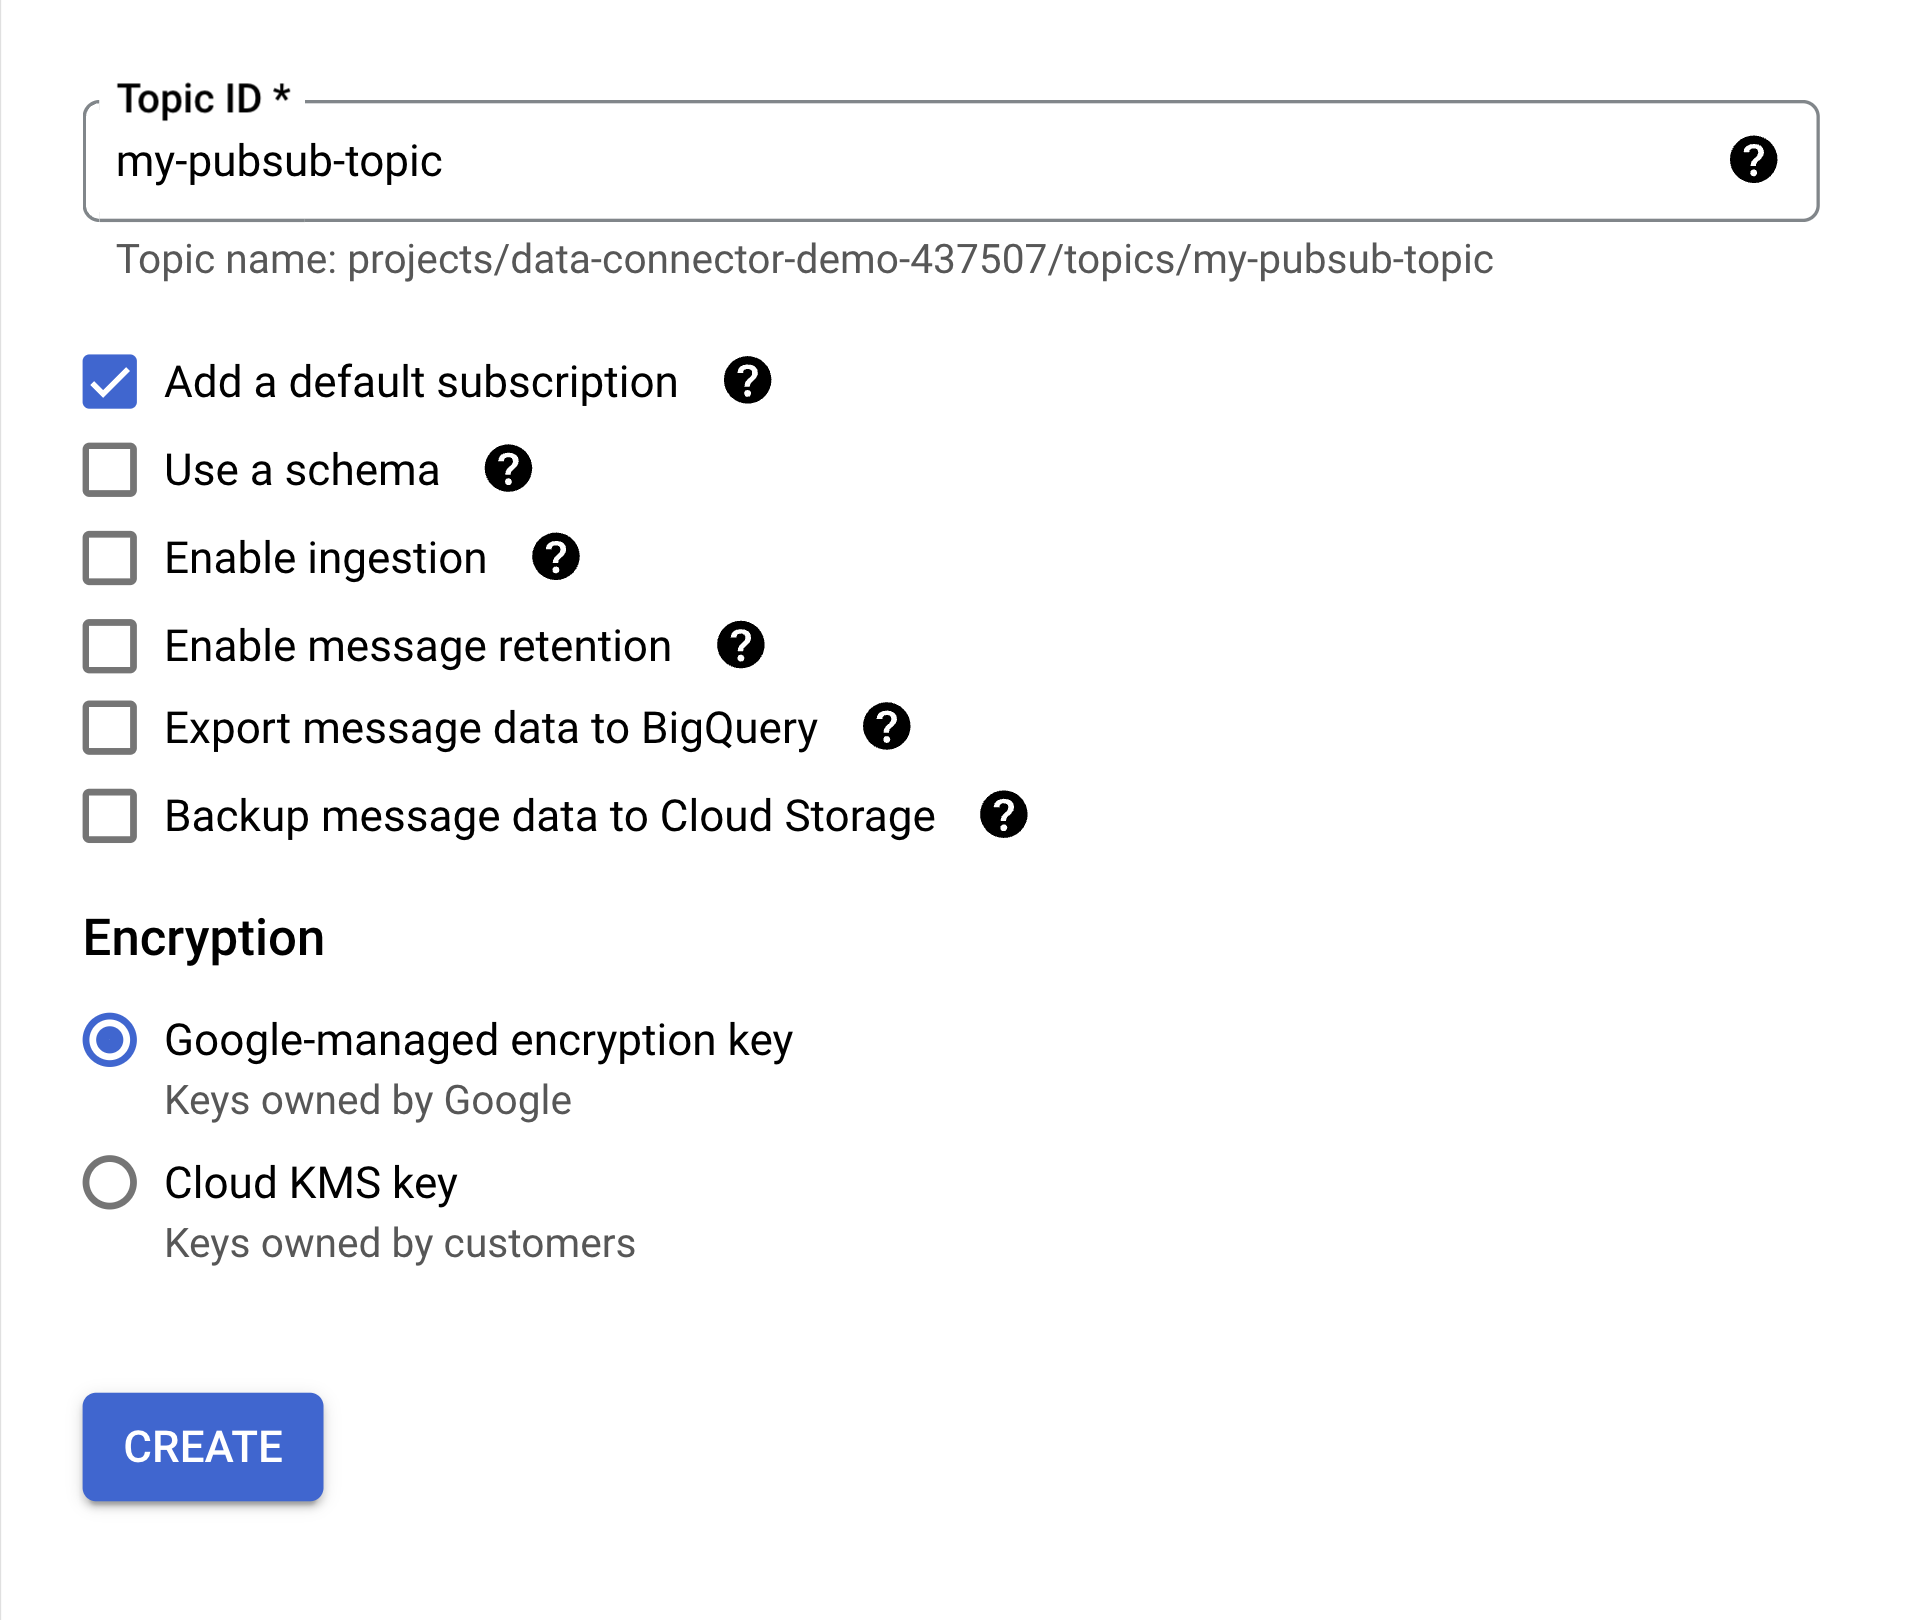
Now we’ll set up the Pub/Sub Topic that the Data Connector will push data into. Find **Topics** under **Pub/Sub** in the left-side pane of the Google Console. Click **CREATE TOPIC** to create a new topic.
Pick an ID for your topic, and leave everything else as default. Click **CREATE** to create the topic.
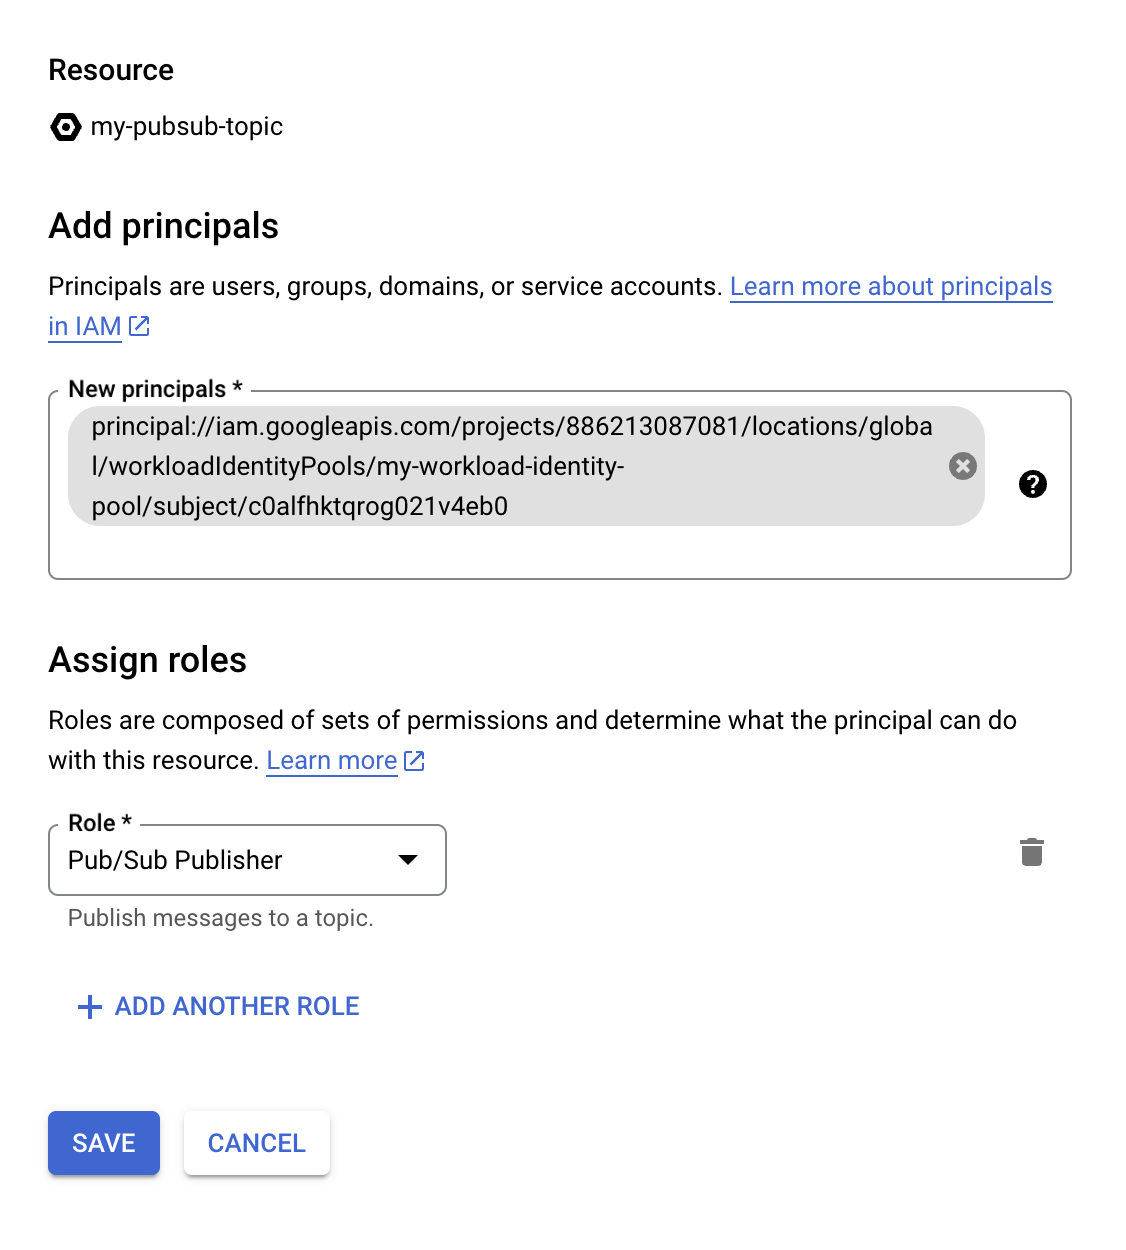
The next and final step in the Google Cloud Console is to grant the identity provider we just set up permission to publish events to this topic. Click **SHOW INFO PANEL** in the upper right, then **ADD PRINCIPAL** under the **PERMISSIONS** tab.
For the principal, enter the **IAM Principle** you copied down from earlier, but make sure to replace **SUBJECT\_ATTRIBUTE\_VALUE** with the ID of your DT Studio organization. You can find this by clicking the name of your organization in the lower left corner of DT Studio.
Select the role **Pub/Sub Publisher** and click **SAVE**.
Now the DT Data Connector should have the needed permissions to publish messages to you Pub/Sub topic. The final step is to set up the actual Data Connector in DT Studio.
## Creating a Data Connector in DT Studio
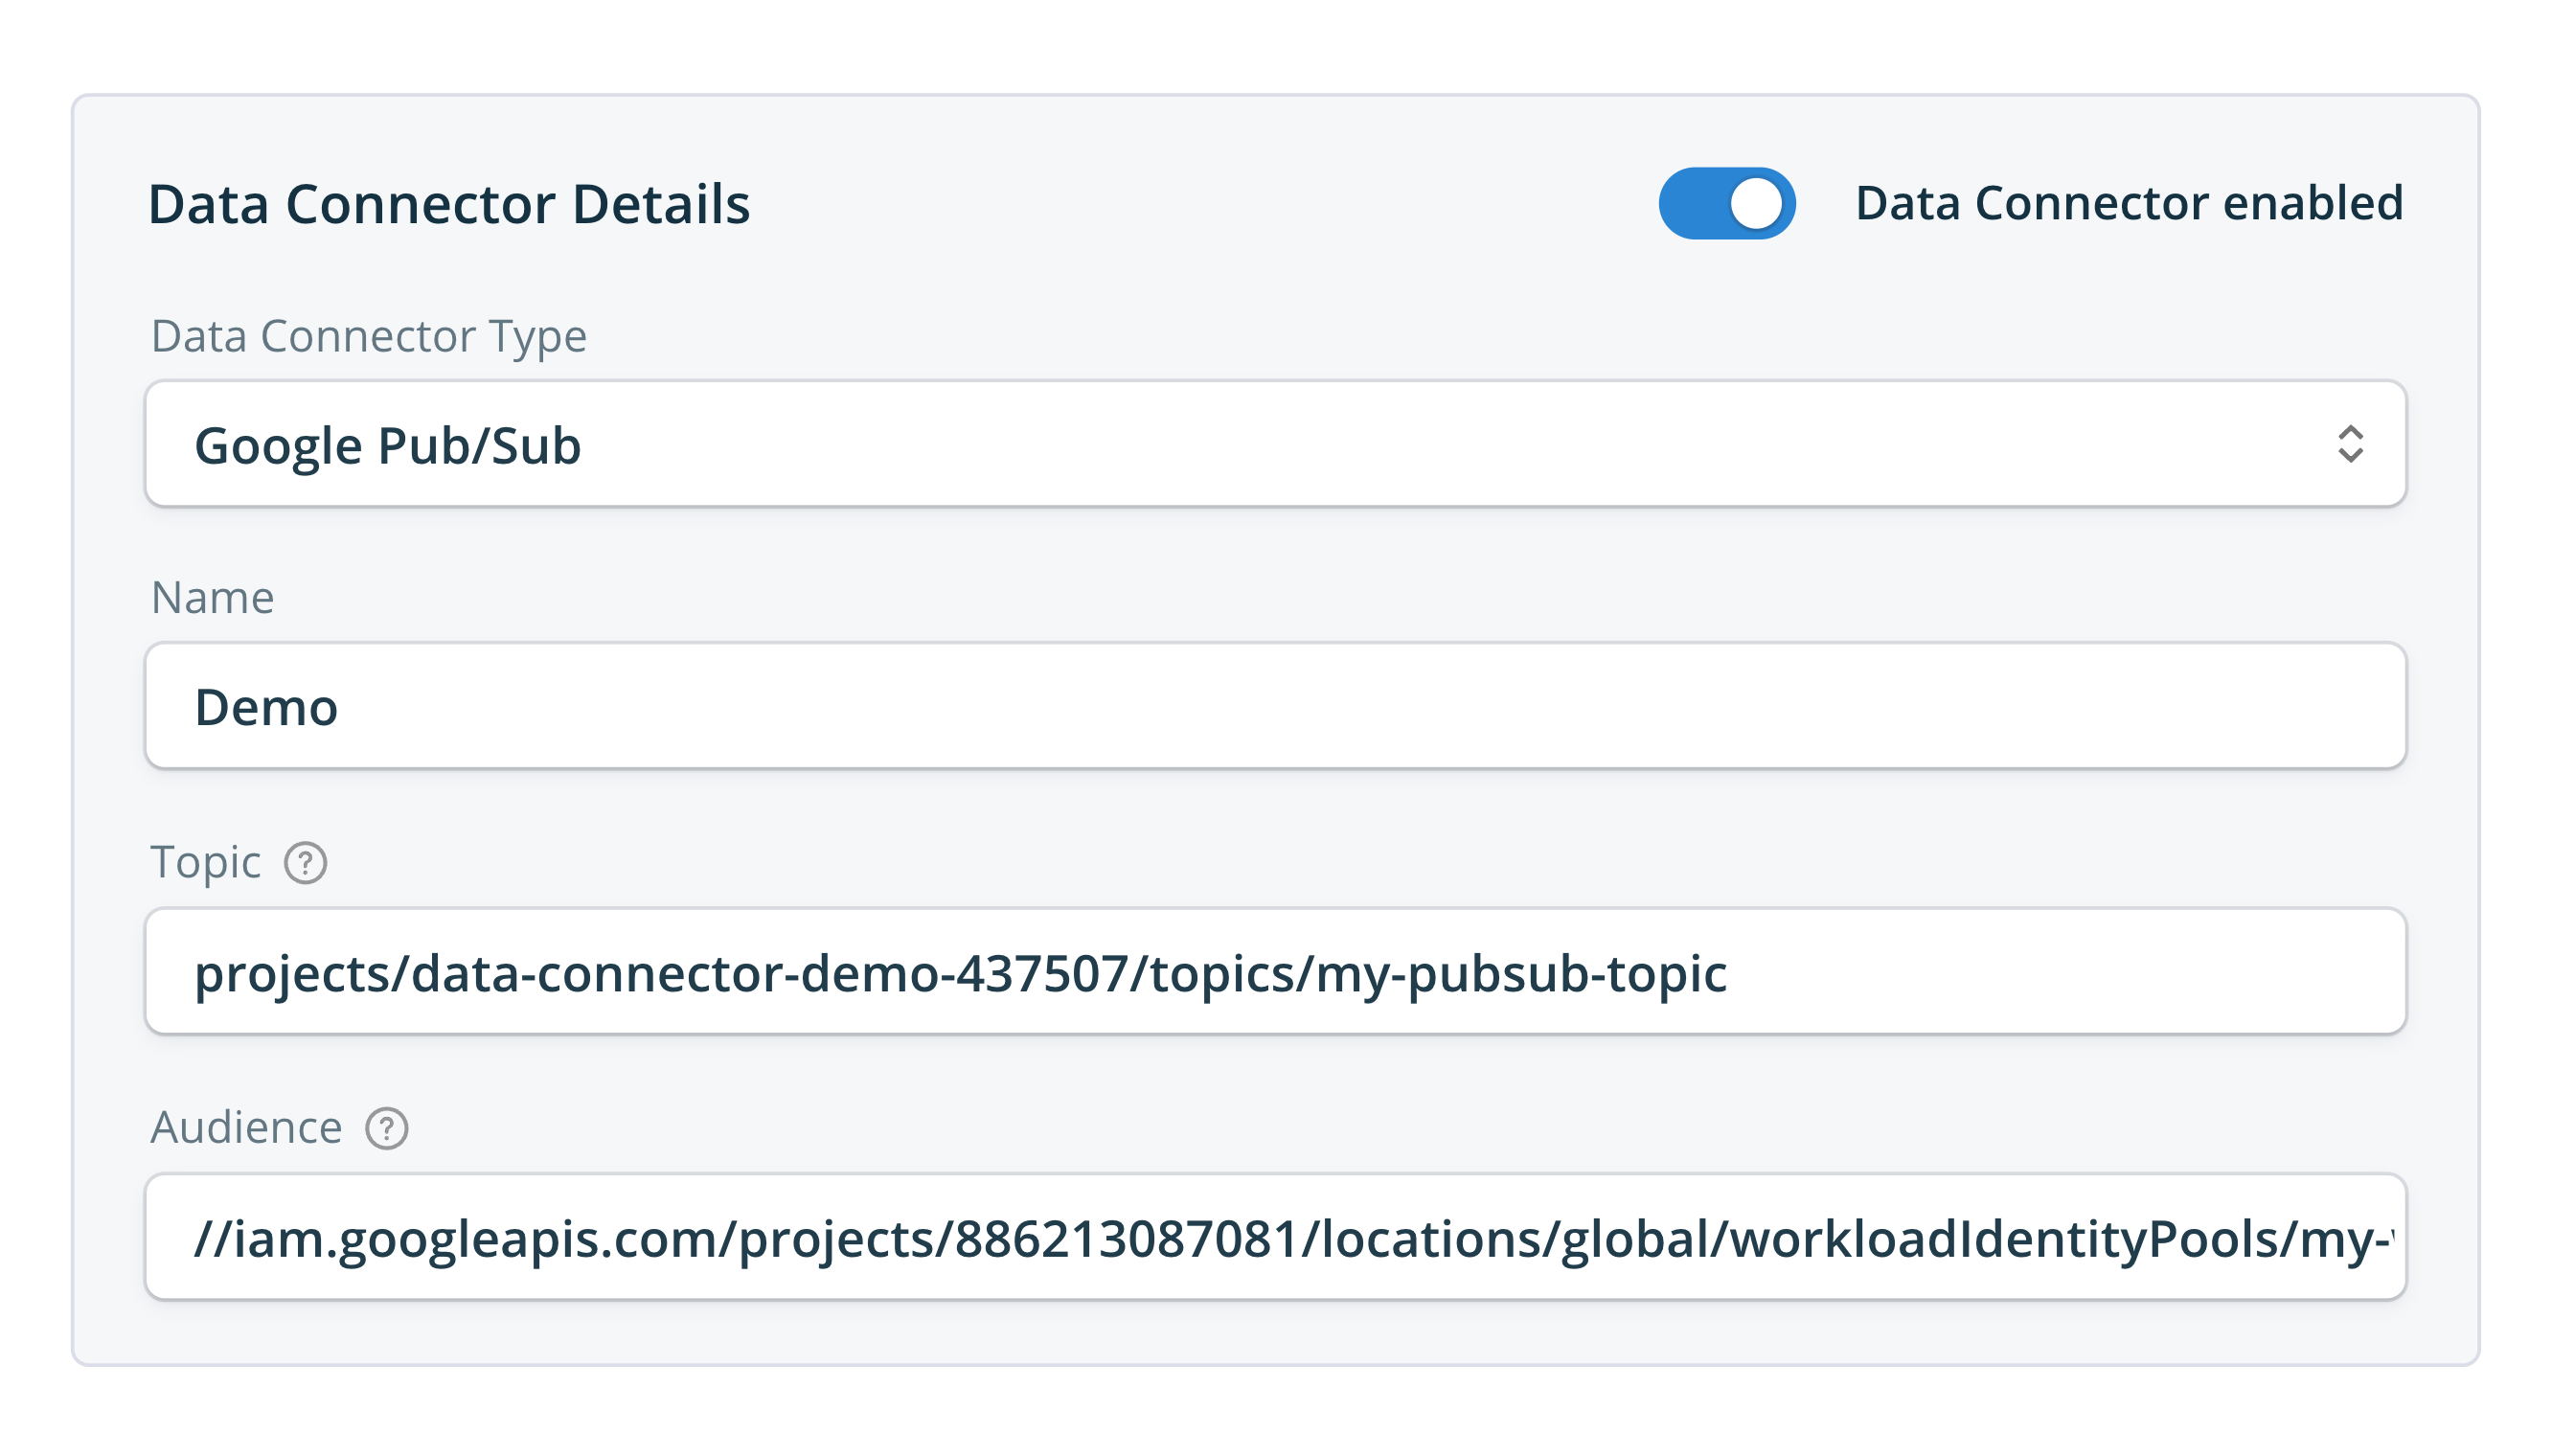
In [DT Studio](https://studio.disruptive-technologies.com/), navigate to your Project. In the left menu locate **Data Connectors** under **API Integrations** and click **Add Data Connector**. This will open the Data Connector configuration menu.
Select Google Pub/Sub as the Data Connector Type, and edit the following parameters:
* **Name**
Give the Data Connector an identifiable name.
* **Topic**
The resource name of the Google Pub/Sub topic that the Data Connector should publish to. This can be found as **Topic name** in the topic overview in the Google Cloud Platform console. It should have the following format: **projects/\/topics/\**.
* **Audience**
This is the audience that you copied down in a previous step. If default audience was selected, it should have the following format. **NOTE:** the `https:` prefix is removed:
{% code overflow="wrap" %}
```
//iam.googleapis.com/projects//locations//workloadIdentityPools//providers/
```
{% endcode %}
## Test the Data Connector
The simplest way of testing your connection is by forwarding an event in one of the following ways.
* Wait for a sensor in the project to naturally emit an event by its [periodic heartbeat](https://disruptive.gitbook.io/docs/concepts/events#periodic-heartbeat).
* Touching a sensor to force an emitted event.
* Use the [Sensor Emulator](https://disruptive.gitbook.io/docs/sensor-emulator) to emulate an emitted event.
Once an event has been forwarded by the Data Connector, each event will be visible as individual events in Google Pub/Sub topic.
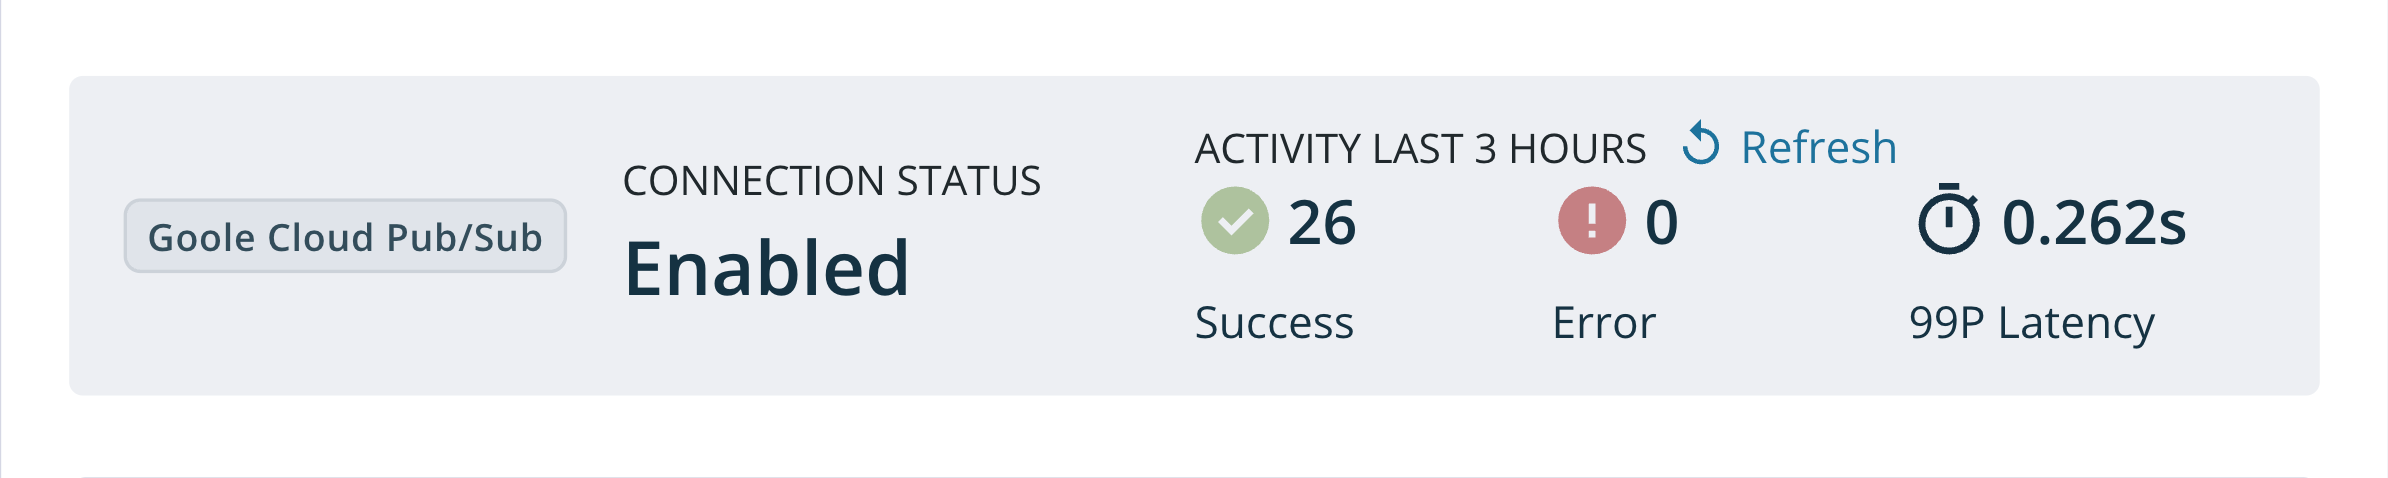
You can verify that an event has been successfully forwarded by looking at the Data Connector metrics.
The Data Connector metrics can be found at the top of the Data Connector page in Studio.
If the Error counter is incrementing, it indicates that the Data Connector is unable to forward events to your topic. This can be for any of the following reasons:
* The topic does not exist or the resource name is wrong. Make sure to include the whole resource name and not just the ID
* The **SUBJECT\_ATTRIBUTE\_VALUE** of the principal in the topic permissions was not replaced with your ***organization***\*\* ID\*\*. Note that this is different from the Project or Data Connector ID.
* You have given the workload identity pool the wrong IAM role. It needs **Pub/Sub Publisher**
* The audience is wrong, if you have added multiple audiences they must all match.
* The subject is wrong.
* You have a whitespace somewhere in the issuer URL. Google does not strip whitespaces from the URL, and the request will fail if there is one.